Set Up the Solution (for solution admins)
This section will walk you through the steps to import and configure the solution to ensure a smooth setup and operation.
Prerequisites
Before you install the solution, make sure the following requirements are met:
- Druid LLM GPT 4.1 resources enabled. LLM resources are required for GPT-based analysis. Contact your Druid sales representative to enable the resources and generate an API token.
Installation and setup procedure
Step 1. Install the solution from the Solutions Library
- Go to the Solutions Library.
- Search for Conversation Toolkit 2.
- Import the solution.
Wait until the import status shows Success.
Step 2. Configure app connections
- Go to Administration > Druid Services.
- Verify that LLM Service Gateway resources are provisioned for the required GPT model (4.1). If it is not provisioned, contact a Druid Admin to enable them.
- Navigate to Solution Contents > Apps.
- Click Publish to make the apps available.
The default connections are preconfigured using tenant credentials.
| App | Description | Provisioning |
|---|---|---|
| DRUID.LLM.gpt4.1 | Used for conversation analysis and metric extraction | Provisioned by Druid |
Step 3. Import default settings
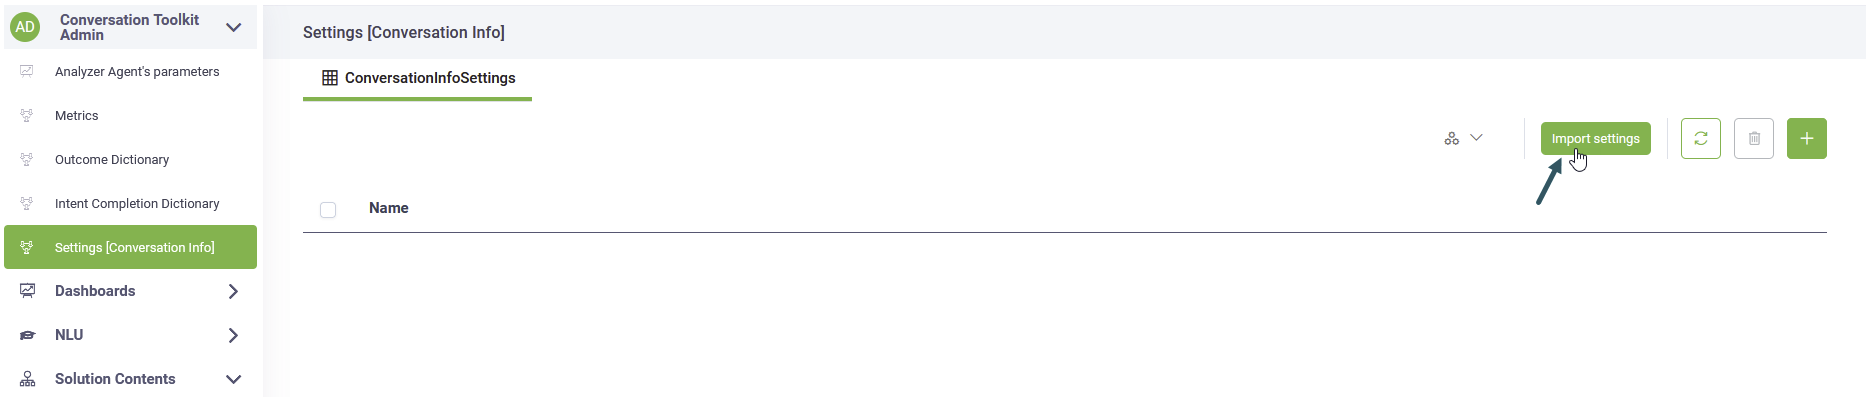
- Select the Conversation Toolkit Admin workspace.
- Click Settings [Conversation Info] on the workspace menu
- Click the Import settings button. This automation populates the main app dictionaries such as Metrics, Intent Completion and Friction with standard values.
Enable Automatic Outcome Generation
By default, if the AI Analyzer cannot match a conversation to any existing outcome in the Outcome Dictionary, the conversation remains uncategorized (no outcome).
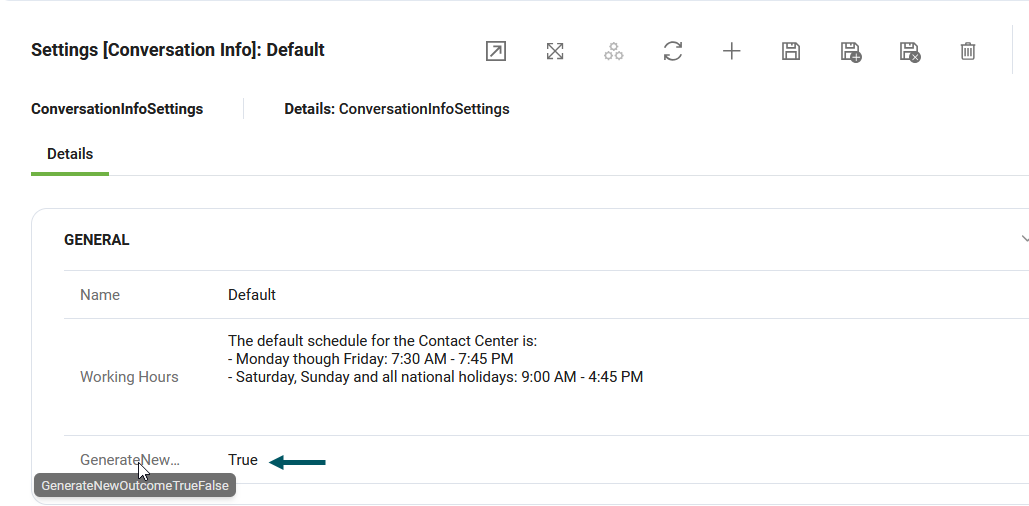
After importing the default settings, you can enable automatic outcome generation to allow the AI Analyzer to generate and add new outcomes to the Outcome Dictionary for conversations that do not match any predefined outcome. This capability is disabled by default.
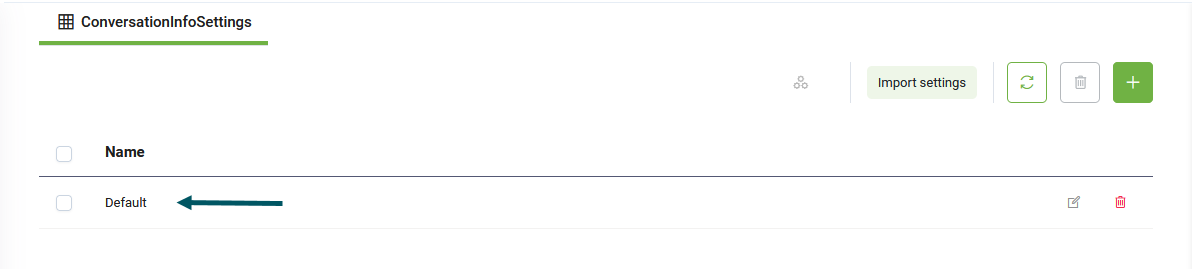
To enable it, click the Default entry to open its details.
Set GenerateNewOutcome to True, and save your changes.
Enable Automatic Friction Intent and Friction Step Generation
After importing the default settings, you can enable the AI Analyzer to automatically generate new friction intent and friction step entries when a conversation cannot be matched to any predefined value in the respective dictionaries.
To enable these capabilities:
- Click the Default entry to open its details.
- Locate the following settings and set each to true:
- Generate new friction intent — Enables the AI Analyzer to create new entries in the Friction Intent Dictionary when no match is found.
- Generate new friction step intent — Enables the AI Analyzer to create new entries in the Friction Step Dictionary when no match is found.
- Save the settings.
Once enabled, the AI Analyzer will automatically propose and add new friction intent and friction step records based on real conversation data, enriching the dictionaries over time.
You can review and manage the generated entries at any time from the Friction Intent Dictionary and Friction Step Dictionary sections in the admin workspace menu.
Step 4. Configure AI Agent special flows
With these flows set, the AI Agent will automatically trigger the Conversation Analyst in real-time, when the user conversation expires.
To configure the required special flows:
- Go to the AI Agent details page and click Dialogue Management.
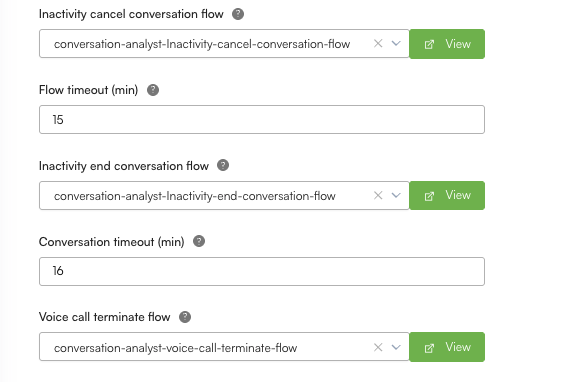
- Set the special flows listed below:
- Save the configuration.
| Special Flow Name | Select |
|---|---|
| Inactivity cancel conversation flow | conversation-analyst-Inactivity-cancel-conversation-flow |
| Inactivity end conversation flow | conversation-analyst-Inactivity-end-conversation-flow |
|
Voice call terminate flow NOTE: Select this special flow only for voice AI Agents.
|
conversation-analyst-voice-call-terminate-flow |
Step 5. Configure metric definitions
Metrics are automatically used by the AI analyst to analyze conversations. Based on these metrics, the outcomes are calculated.
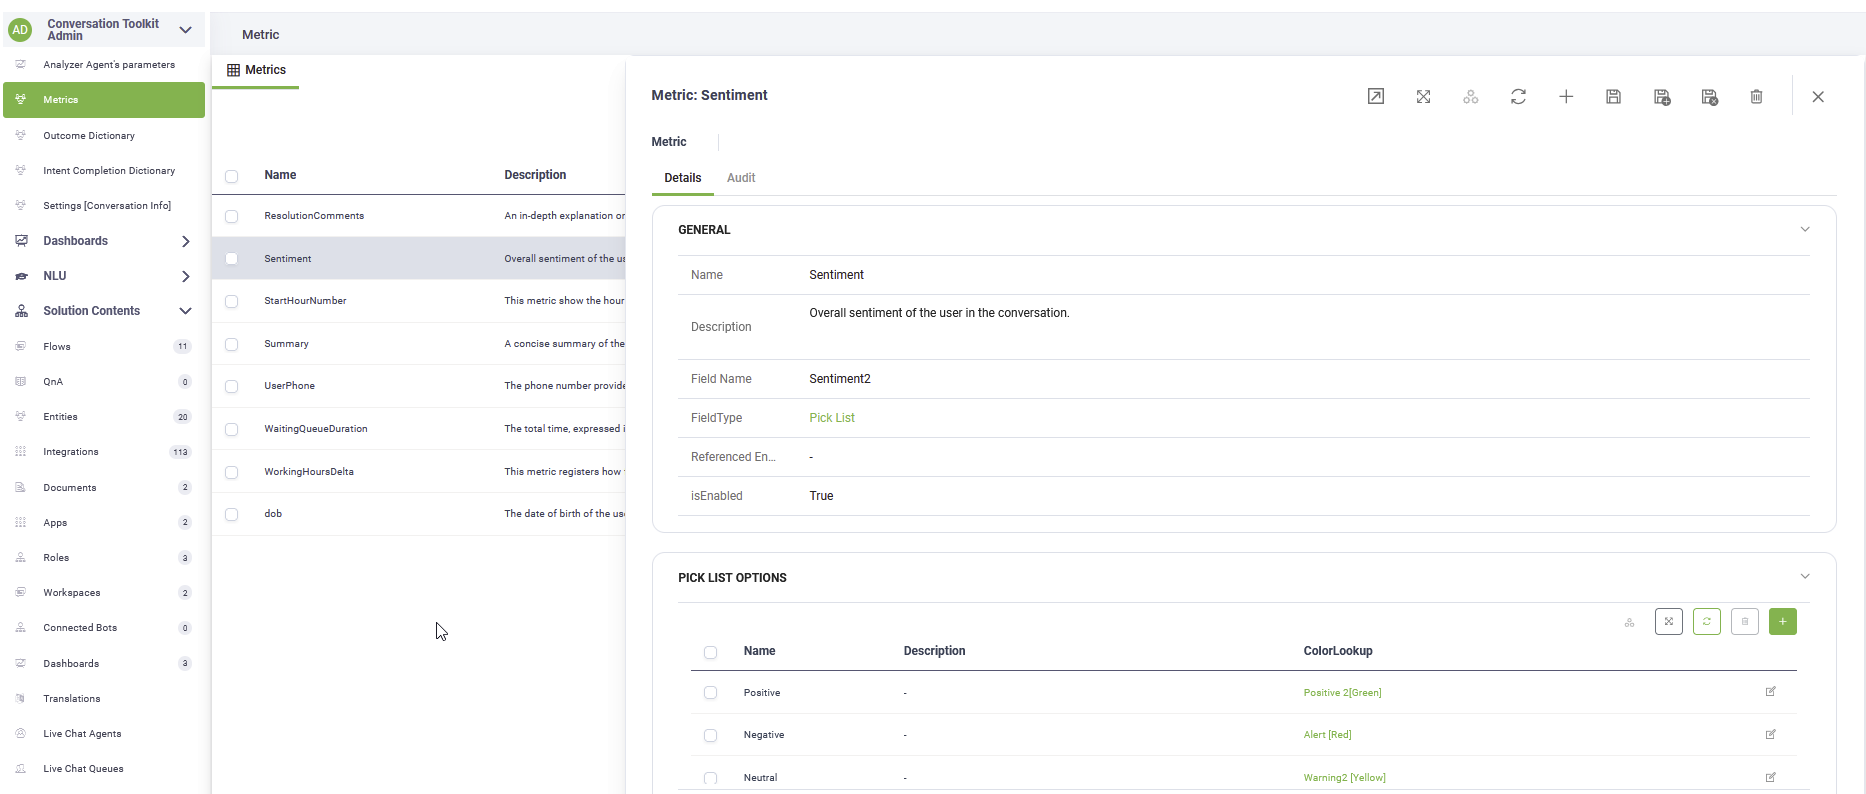
On the main menu of the Conversation Toolkit Admin workspace, click Metrics. Define or customize the metrics to be extracted by the AI analyst.
The solution contains a set of predefined metrics. The description offers guidelines for the AI Analyst to use during the conversations processing.
The following predefined metrics are considered when calculating values for the different dashboards and drill-down views.
| Metric | Description | Metric Type |
|---|---|---|
| Agent Conversation Duration | The total duration of the conversation between the user and the human agent in the live chat session. The duration is computed and expressed in seconds, from the moment the human agent picked up the conversation and until she finished it. Compute the value by subtracting the timestamp of the conversation start from the timestamp of the conversation end, or of the last message delivered in the conversation. The value is expressed in seconds and MUST always be an integer value, not string. If you cannot compute the value, assign 0. | Integer |
| Agent Didn't Respond | This flag indicates if an Agent did not reply in a livechat conversation to a user question. The value should be set to TRUE if the user addressed a question or offered information and the Agent did not answer back before the conversation ended. If the conversation occurred normally and the Agent answered to all user question, the value must be FALSE. | Boolean |
| Agent Name | The full name of the human agent who provided information to the user in the live chat session. | String |
| Agent Start Time | The time of the day when a human agent picked up the livechat conversation and addressed the user. The value must be expressed in the following format: HH:MM (for instance, 17:47). Make sure to provide the exact local time, as supplied in the conversation history transcript. | DateTime |
| Clarity | Clarity assessment of the conversation. | Pick List |
| Clarity Explain | Explanation of why the clarity was chosen. | String |
| Connected To Agent | This metric reflects if the user started a Live Chat session with a human agent. Its value is of type Boolean, TRUE if the user talked to a human Agent, FALSE if the user did not talk to a human agent, although he was placed on a queue. | Boolean |
| Connected To Queue | This metric reflects if the user chose to talk to a human agent and was placed in a Live Chat queue. The expected value is of type Boolean, TRUE if the user was placed on a live chat queue and FALSE if the user explicitly said that she does not wishes to be helped by a human agent | Boolean |
| Conversation Duration | The total duration of the user conversation, taking into account both the user - AI Agent conversation and the user - human agent conversation, taking place in the same session. Compute the value by subtracting the timestamp of the conversation start from the timestamp of the conversation end, or of the last message delivered in the conversation. The value is expressed in seconds and MUST always be an integer value, not string. If you cannot compute the value, assign 0. | Integer |
| Data Captured | List of key entities or data points captured during the conversation. No duplicates. | Entity List |
| Friction | Overall friction experienced by the user in the conversation. | Pick List |
| Friction Explain | Explanation of why the friction level was chosen. | String |
| Friction Intent | The specific intent or issue that caused the friction, if applicable. If there is no friction, return null. | String |
| Friction Step | The specific step or message in the conversation that caused the friction, if applicable. If there is no friction, return null. | String |
| Full Name | The full name of the user, if mentioned in the conversation. If not mentioned, return null. | String |
| Intents | Intents referred to in the conversation. Try to match with the dictionary. Recommend new intent if not found. Intent UUID is Null if it is a new intent, not available in the dictionary. | Entity List |
| Is Authenticated | Whether the user has been authenticated in the conversation. | Boolean |
| Is Outside Working Hours | This flag, of type boolean, indicates if the user conversation occurred outside the normal working hours of the Contact Center. The value must be set to "false" if the conversation took place during the Contact Center standard working schedule, and the value must be set to "true" if the conversation took place outside the regular schedule. | Boolean |
| Language | Dominant user language. | String |
| Livechat End Time | The time of the day when the live chat conversation between the agent and the user ended. This is the timestamp of the last message sent either by the agent or by the user in the live chat session. The value must be expressed in the following format: HH:MM (for instance, 17:47). Make sure to provide the exact local time, as supplied in the conversation history transcript. | DateTime |
| Livechat Queue | The Live Chat queue name in which the user was placed by the AI Agent to receive information from a human agent. | String |
| Origin | The full address of the website page from where the user accessed the web chat. | String |
| Outcome | The conversation topic and handling path based on the transcript. Identify the deepest level in the hierarchy as applied to the conversation. | Entity |
| Outcome Explain | Explanation why you selected the conversation topic. Include the complete hierarchy path for the selected topic. | String |
| Outcome L1 | The first main topic category of the conversation based on the transcript. | Entity |
| Outcome L2 | The second level topic of the conversation based on the transcript. | Entity |
| Outside Working Hours Explain | This metric contains the reasoning for classifying a user conversation outside the Contact Center normal working hours, provided as context information. Do not use any other information for evaluating this metric than the Start Time and End Time provided for that date from the Contact Center schedule. You can assume that all time values are in Local Time and do not use any conversions. Base your reasoning on the exact values without any conversions. | String |
| Primary Intent | Main goal of the user. Short intent label or sentence that captures the user's main objective (e.g., 'Track order', 'Reset password', 'Find pricing'). Should be specific enough to map to taxonomy. | - |
| Queue Start Time | The time of the day when the user was placed on the Live chat queue. The value must be expressed in the following format: HH:MM (for instance, 17:47). Make sure to provide the exact local time, as supplied in the conversation history transcript. | DateTime |
| Resolution | Final resolution outcome based on the user intent and conversation path. If Transcript is empty, Resolution is Pass. | Entity |
| Resolution Comments | An in-depth explanation of why you selected the resolution. | String |
| Sentiment | Overall sentiment of the user in the conversation. | Pick List |
| Start Hour Number | The time when the user conversation started. For instance, if the user started the chat at 9:47 AM, the value of StartHourNumber = 9. Or if the user started the conversation at 22:47, StartHourNumber = 22. The value is provided in UTC and must be converted to local time. In this case add 2 hours to the provided value. | Integer |
| Summary | A concise summary of the conversation. | String |
| User Phone | The phone number provided by the user during the conversation | String |
| Waiting Queue Duration | The total time, expressed in seconds, spent by the user while waiting in the queue, from the moment the AI Agent placed the user in the queue and the moment a human agent started the live chat session with the customer. Compute the value by subtracting the timestamp of the message when the user was placed in the queue from the timestamp of the message when the Agent started the live chat session. The value is expressed in seconds and MUST always be an integer value, not string. This information is also found in the Events array of the ChatActivityData payload. If you cannot compute the value, assign 0. | Integer |
| Working Hours Delta | This metric registers how far away from the normal Contact Center working hours the user conversation took place. The value of this metric is always an Integer and is computed in the following way: * if the user conversation started between midnight (00:00 AM) and the Start Time of the Contact Center, the value of the metric is computed as the difference between the hour when the user conversation started and the hour when the Contact Center program started, and it's always negative. For instance, if the user conversation started at 6:32 AM, and the Contact Center started at 8:00, Working Hours Delta = 6-8 = -2 * if the user conversation started after the Contact Center program ended but before midnight (i.e., until 23:59), the value of the metric is computed as the difference between the hour when the user conversation started rounded to the next value and the hour when the Contact Center program ended, and it's always positive. For instance, if the user conversation started at 22:27 and the Contact Center program ended at 19:00, Working Hours Delta = 23-19 = 4. * Do not convert any dates to Local Time zone, as they are all provided in UTC. The computations must be done using the values provided without any conversion! | Integer |
| dob | The date of birth of the user in YYYY-MM-DD format, if mentioned in the conversation. If not mentioned, return null. | DateTime |
When adding a new metric, consider providing the following the Name, Description (guidelines for the AI Analyst), Field Name, Field Type and set isEnabled to true.
Step 6. Configure the conversation outcomes
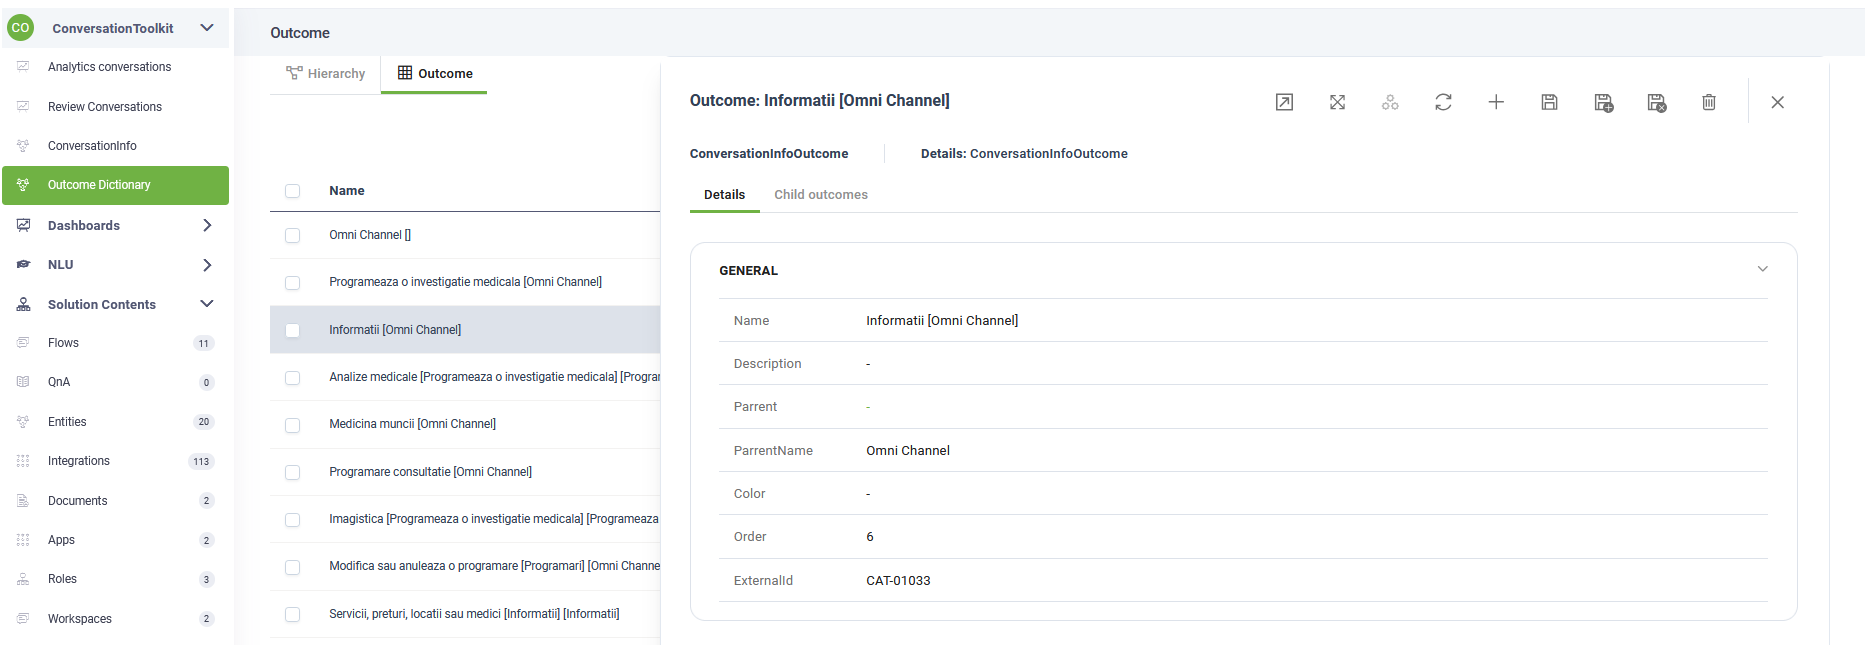
Outcomes define the topic and handling path of a conversation. They describe what the user wanted to achieve and how the AI Agent handled or routed the interaction.
Outcomes are organized by business areas (for example, Account Management, Leasing, or Insurance) and can be high-level or very specific. They help you categorize conversations, measure performance, and identify unresolved or escalated requests.

We offer Outcome templates that contain a set of predefined outcomes (in English) across four different industries. Download the template that is relevant to you by clicking the industry-specific link below:
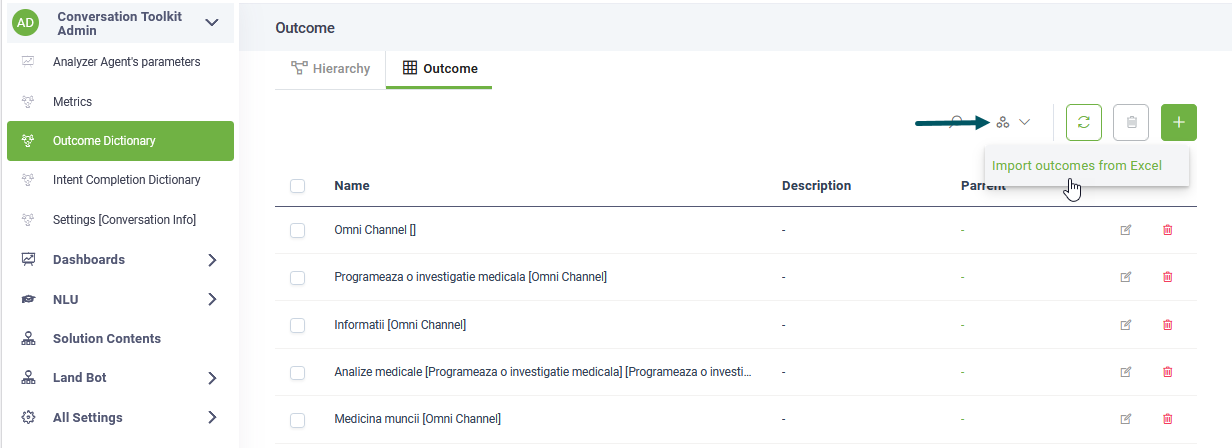
To configure the outcomes, on the main menu of the Conversation Toolkit Admin workspace, click Outcome Dictionary. From the automations, select Import outcomes from Excel and upload the Outcome template for your specific industry. You can also manually add new outcomes based on your needs.
While the solution includes a suite of predefined outcomes tailored to your industry, you can customize the set by adding new entries that align with your specific business requirements. These outcomes serve as the primary targets for the AI Analyst when categorizing user intent.
To manage your outcomes:
- Select Outcome Dictionary from the main menu of the Conversation Toolkit Admin workspace.
- Review the existing set of available outcomes to avoid duplication, then add any new definitions required for your use case.
Adding a new outcome in the future does not automatically update previously analyzed conversations. To ensure the AI Analyst evaluates conversations against your updated outcomes:
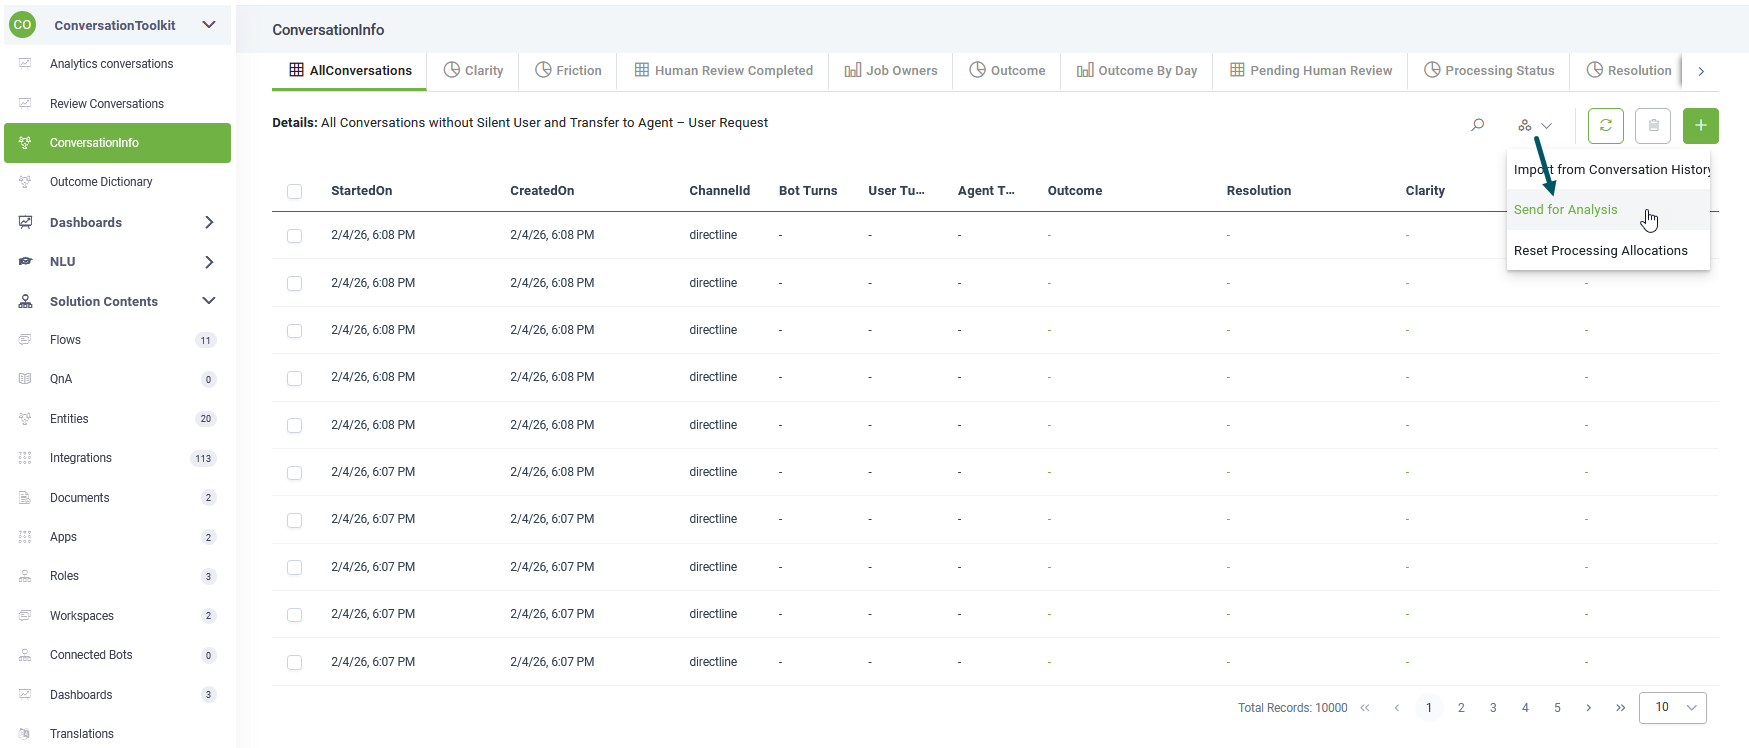
- Click ConversationInfo on the workspace menu.
- Run the Send for Analysis automation.
- Follow the interactive chat guide to re-process the relevant conversations, ensuring the AI incorporates the newly defined outcomes into its evaluation logic.
Step 7. Create Alert Subscribers
The solution contains an alert-driven flow that triggers the AI analyst, which:
- Analyzes each conversation
- Evaluates it against all predefined metrics
- Extracts and stores metric values in a structured format
The conversation analysis is performed by runner users (system users) that are subscribed to the conversation processing alert. Whenever the user sends the conversation for analysis, the conversation assignment flow that comes with the solution assigns automatically conversations to subscribed users.
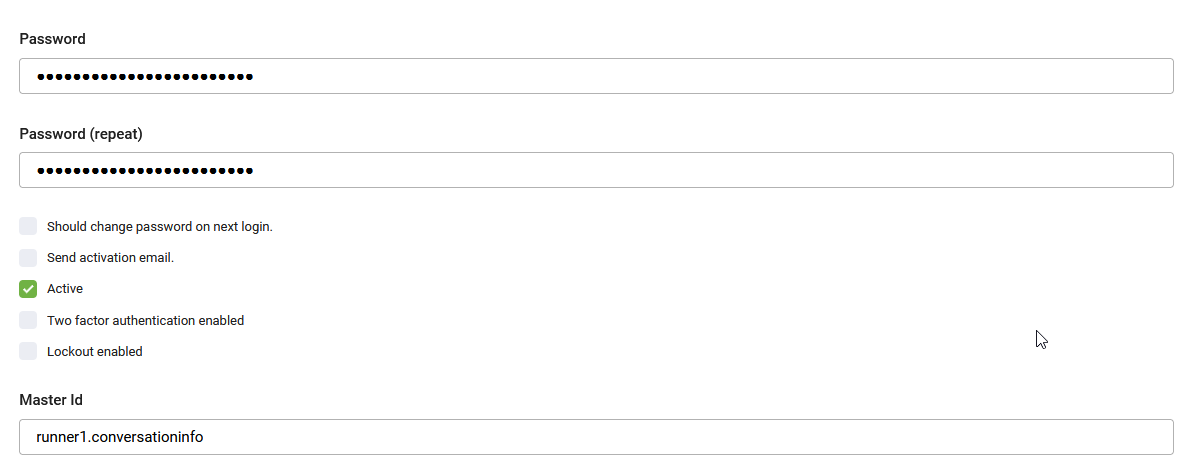
To create these dedicated runner users, go to Administration > Users and create 5 users with the following exact usernames, then assign them the Admin role:
- runner1.conversationinfo
- runner2.conversationinfo
- runner3.conversationinfo
- runner4.conversationinfo
- runner5.conversationinfo
As these are system users who will be used for analyzing the conversations, you can provide fictive name, surname and email addresses.
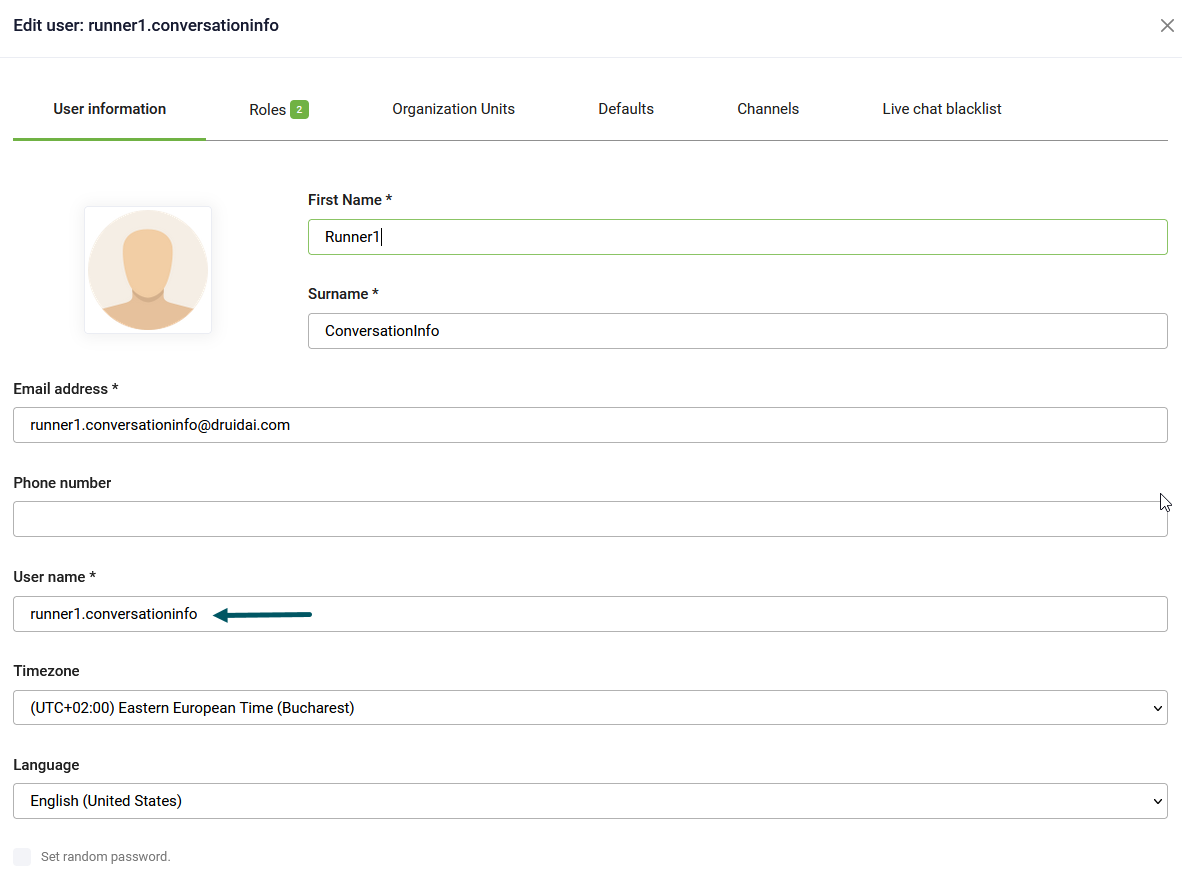
For these users make sure to set a password and select Active.
Step 8. Enable AI-driven alert flow
The conversation analysis is performed by runner users that are subscribed to the conversation processing alert. The alert flow processes the conversations automatically.
To configure the conversation processing alert:
- Go to Solution Contents > Flows.
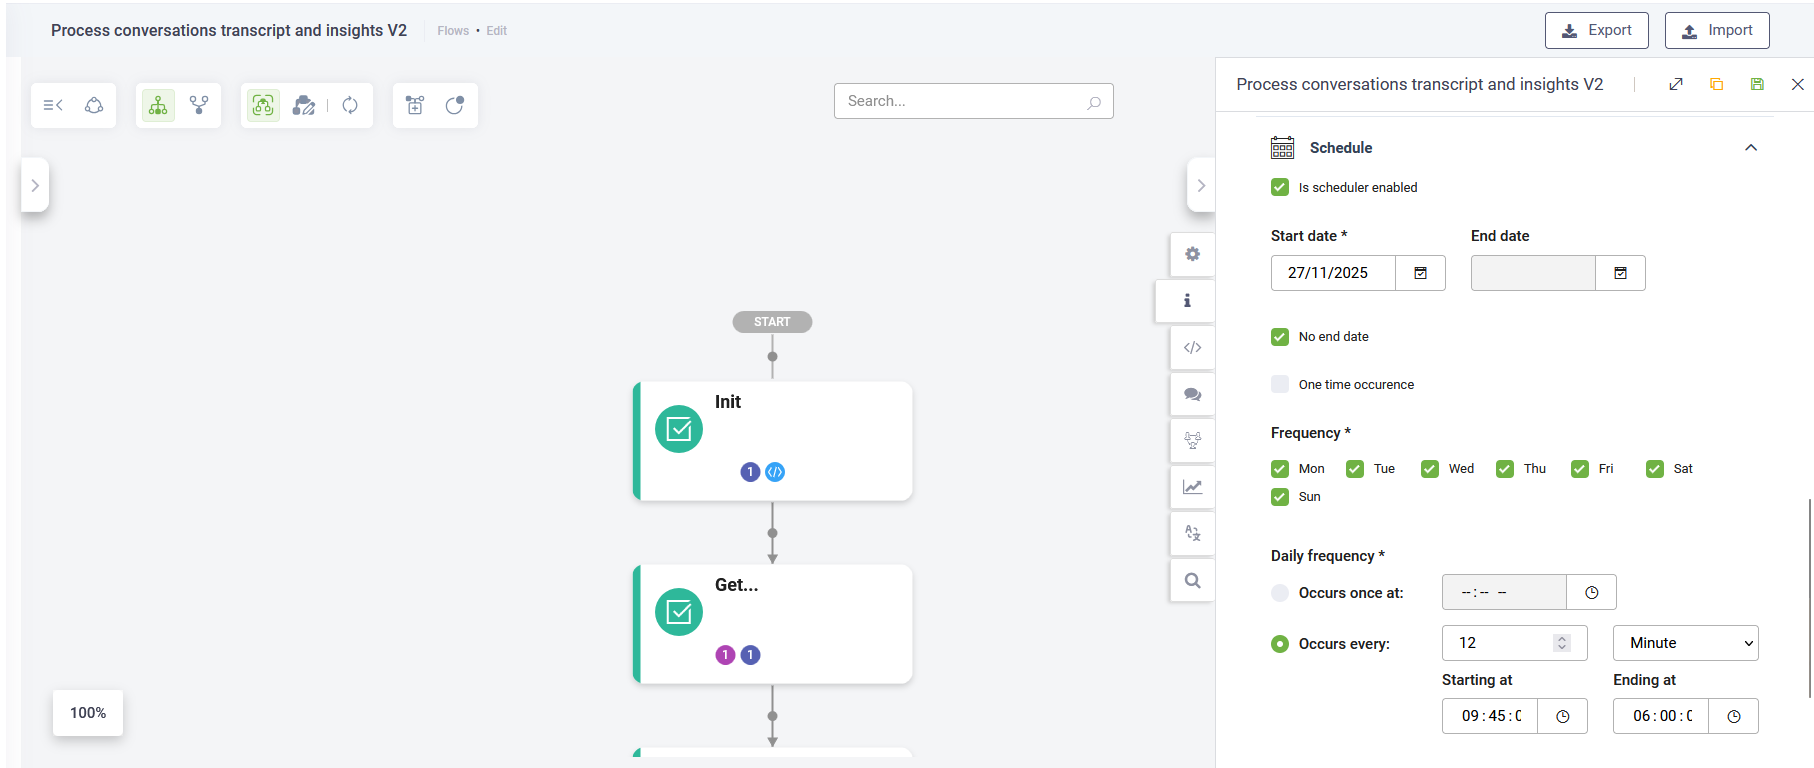
- Search for the Process conversations transcript and insights V2 flow and click on it.
- Click the Info icon to review flow details. The flow editor appears.
- Click the Scheduling tab.
- Add static subscribers. Select one or multiple users from the runner users you created previously.
- Click on Schedule and select Is scheduler enabled.
- Configure the execution schedule.
- Save the flow.

The alert will now run automatically, analyzing historical conversations and extracting metrics without further manual intervention.
Step 9: Analyzing Historical Data
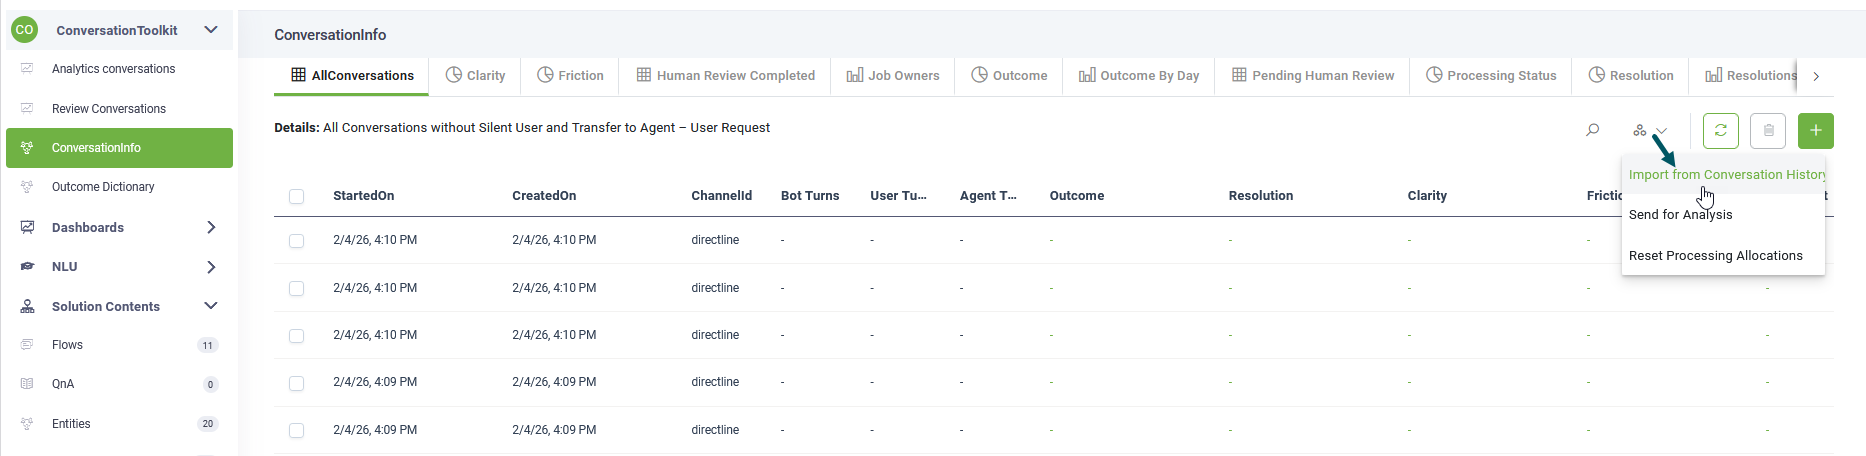
Starting with Druid version 9.11, conversations are automatically logged in the [[ConversationInfo]] entity for immediate AI analysis. However, if you need to analyze interactions that occurred prior to January 16, 2026, you must manually import them from the Conversation History database using the following procedure:
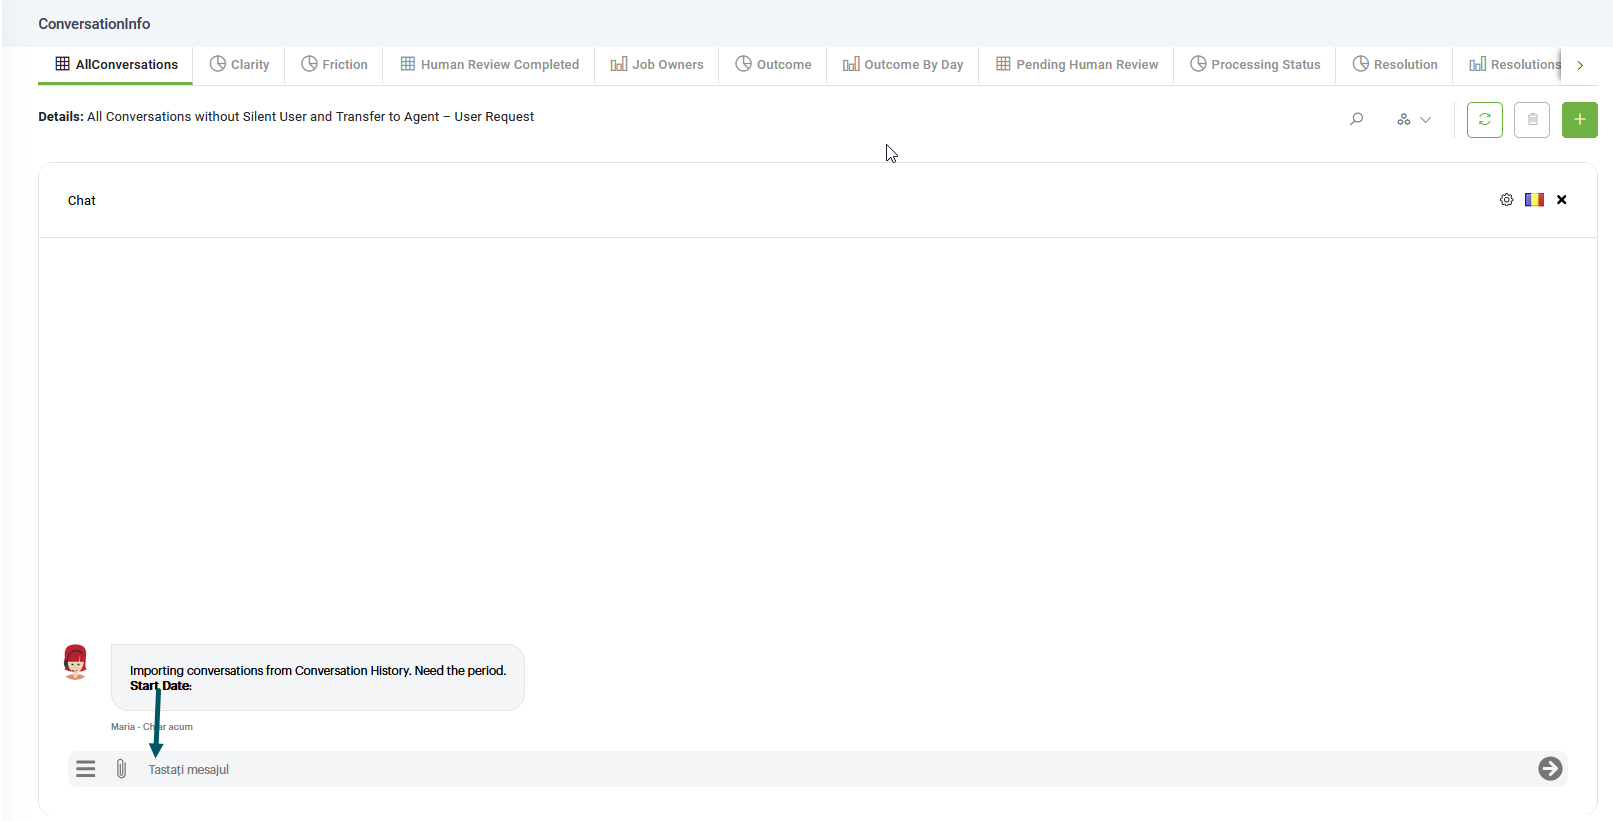
- Initiate Import: On the Conversation Toolkit workspace menu, select ConversationInfo, and run the Import from Conversation History automation.
- Follow the Guidelines: An interactive chat window will open to guide you through the data selection and import process.
- Send for Analysis: Once the import is complete, close the chat window. To generate insights for these newly imported records, run the Send for Analysis automation. This will assign conversations to job runners for processing.
- Follow the Guidelines: An interactive chat window will open to guide you through the process.
When the conversation transcripts are processed, the data will populate the dashboards.
Upgrade the solution
To upgrade to a new version, follow these steps:
- Go to Solution Library.
- Search for Conversation Toolkit 2.
- Select the solution, then click Upgrade.
- Select the Conversation Toolkit Admin workspace.
- In the workspace menu, select Settings [Conversation Info].
- Click the Import settings button.